
During the lockdown, the entire YugaTech team transitioned from a hybrid setting to a 100% WFH setup. This was a huge undertaking when we closed our office studio, moved most of the office stuff to rented storage, and distributed essential equipment to key staff members.
Almost three years later, this January, we looked for a new space and finally found a perfect place to settle in and call our new headquarters. It took us only 4 weeks to renovate the 300sqm space, removing unnecessary fittings and built-ins, repairs, repainting, and installing new lights and electricals. We were all hands-on during the entire process, working with our in-house carpentry team to customize each and every room to our requirements.

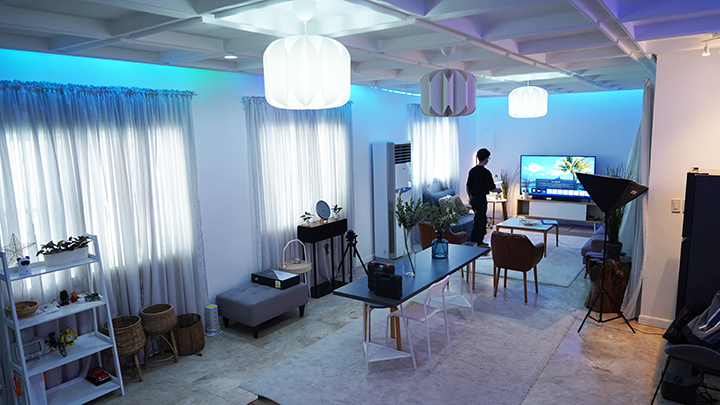
Most of the videos you now watch on our YouTube channel are done in our new Studio HQ. However, the work did not end there. There were many smaller things to work on, and most of them were done by the team as a DIY project — from the installation of our honeycomb LED lights in the A-ROLL room to the wiring of LAN cables across all rooms, fixing new decorative Ikea lights and furniture and many more. We previously made a Studio Tour here if you want to see what the place looked like a couple of months after we moved in.
The next challenge was to Marie Kondo the space so that we know where stuff is placed and equipment is located. It was a huge inventory nightmare and after dozens and dozens of storage bins and organizers, we’re not even halfway done (things always get misplaced every time a team member uses them).
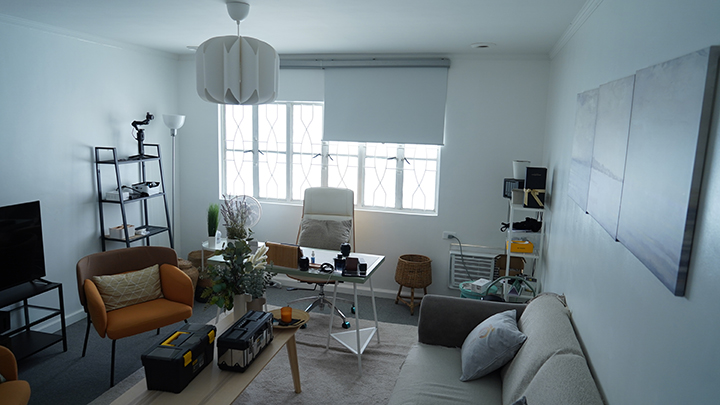
As the main architect and designer of our studio, I keep a separate stash of tools and whatnot in my office. I have my own drill bit, screw drivers, hooks and clamps, and even a laser measuring tape and laser leveler.

Along with renovating and organizing our new studio HQ, we though it’s also timely to re-organize the tool kit.
The toolbox that we got comes in two variants — the first one is this Deli Plastic Toolbox (they come in different sizes — 12”, 13”, 14”, and 15” — and the one we got is the biggest). This heavy-duty tools box organizer (DL432417) has an exterior dimension of 380mm x 200mm x 180mm and is made of polypropelene material (thermoplastic), making it lightweight and one of the safest commercial plastics in the market.
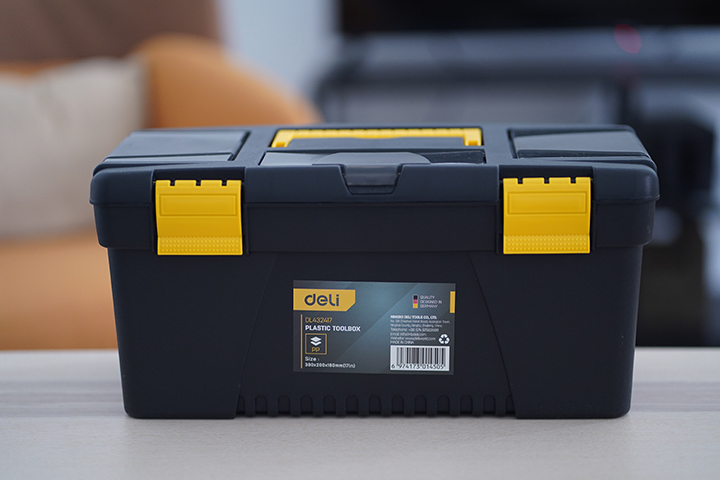
This box is large enough to hold a lot of items we frequently use in the studio — a crimping tool for LAN cables, a stapler gun, an electric screwdriver, a heat gun, a glue gun, a tape measure, various kinds of tape and screws, etc. and a WD40!
There is a removable top layer for the tray, so you can organize the items in the box according to their sizes and easily find things inside the box. There are also smaller tucked-in compartments on the exterior lid cover of the box for much smaller items like screws, nails, pins, and washers.

This is the type of toolbox you will need at home or inside the trunk of your car. It’s durable, has a lot of storage space, and is great for organizing your tools.
Along with it, we also this this Mitsushi MLDZ12T Cordless Drill as our primary fixer. The cordless drill runs on 12V with adjustable speed for proper adjustment to the type of drilling you’d need. The variable drilling speed adjusts depending on the downforce (or forward force) you apply to it.
The battery is a 3.7V 1300mAh Lithium-ion and lasts for quite a while (for weeks, actually) if you’re just doing light work. The collet can hold drill bits of varying sizes — from 0.8mm to 10mm. The kit comes with a comprehensive set of accessories (around 29 in all), from varying sizes of drill bits, multi-functional drive bits, and nut drivers.

We also love this flexible drill bit extension that you can use to fix those hard-to-reach nooks and crannies. There’s also an extra battery pack so you can quickly replace batteries on-the-go while the other one is being charged (typically about one hour to fully charge).
The dual or 2-speed function allows for both high-speed and high-power and the 25 clutch settings enable efficient and accurate screwing while reducing fastener damage. We’ve had no problems with drilling thru typical surfaces like wood, plastic, tile or metal. At some extent, it can also drill thru concrete gravel but with hard cement you may need something more powerful.

Here are some of the learnings we got from our latest office studio build.
- You can never have enough storage boxes. Wether it’s a Balikbayan box for long-term storage, Ikea boxes for proper display of frequently used or accessed equipment or a Deli toolbox for carrying smaller items around the studio, it is best to have ample storage to avoid clutter.
- Put a label on them. We have a couple of labelers in the studio for all the small to medium storage boxes that are stacked in the open cabinets. We also print out bigger signages or labels on an A4 bond paper and laminate them then stick them on the side of the bigger boxes.
- Spreadsheet your inventory. We use Google Sheets to make an inventory of tools, equipment, review units, loaner units and many more.
- Set a simple and transparent tracker. We created a channel in our Discord server so that people can note if they checked out a unit or equipment and when they returned it. We also use the same tracker to log in newly arrived unit and log out returned or picked-up units (including a photo of the messenger).
- Leave it if you don’t need it. For years, we’ve had problems with missing chargers and cables for most of the smartphones we review. It became stressful that we decided that our new SOP is to simply leave the cables, chargers and the box itself in the studio and only bring out the actual unit itself.
- Set up a dedicated sections or stations. We have multiple charging stations, a props station, a camera station, a flat lay station — which means if you need something, just head over to that station and you’d find what you’d be looking for (well, most of the time). It can still get messy but we dedicated Fridays as our Marie Kondo day to get back to a more organized state.
- Keep extra items in storage. You’ll never know when you will need an extra socket adaptor, bulb, or extension cord any day.

And it’s never completely done. We constantly move things around, re-arrange furniture and re-decorate based on the team’s needs, the set up for a shoot or even out of convenience. So, we always keep extra storage around and organize them during downtimes (or if we’re ahead of our daily video uploads).
0 Comments
Leave a Reply