
Last year, GCash announced that it is already capable of transferring funds from your GCash wallet to your bank account. This is a big deal as it offers customers to move their funds straight from the GCash app on their smartphone or tablet, removing the need to line up in banks to deposit. And to top it off, the service is free. So, if you’re new to GCash and haven’t tried this service, then let us help you with this guide.
![]()
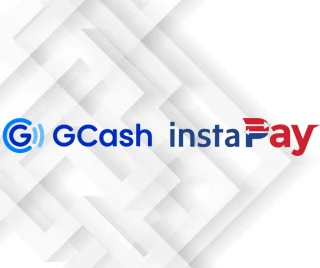
Before we get started, here’s a short recap of what GCash Bank Transfer is all about. GCash users can now use GCash to transfer funds for free to over 30 banks. The service is powered by InstaPay, an initiative of the Bangko Sentral ng Pilipinas that allows you to electronically transfer funds to and from banks in real time as well as non-bank e-money issuers in the Philippines.
GCash also lets you transfer funds from their existing banking facilities straight to their GCash. The process of funding your GCash Wallet is called Cash-In. Also note that GCash works on Globe, TM, Smart, Sun, and Talk & Text, so there’s no need to purchase a different SIM as long as you’re using any of these mobile networks.
Now that we’ve got that out of the way, let’s start with the process. We’ll assume that you already have a full-functioning GCash account. The first step would be to Cash-In by tapping on the “+” sign beside the available amount or the Cash-in icon below it. The app will take you to a new page with three options to cash-in: over-the-counter, online banking, and remittance. For this guide, we’ll focus on online banking.
![]()
Inside the Online Banking tab, you will see a list of preferred banks. As of writing, we have BPI, RCBC, UnionBank, AUB, Maybank, Metrobank, PBCOM, PSBank, and an option to add other MasterCard/ Visa Debit Cards. Each bank has specific procedures to link GCash to your bank account so make sure to follow the instructions specific to your bank.
Let’s Cash-In! Using our preferred bank (in this case, it’s our BPI savings account), all you need to do now is enter the amount that will be transferred to your GCash wallet. Once entered, an authentication request will appear, or an OTP to your registered number. Once verified, you can now see the full amount in your GCash wallet.
![]()
Now that your GCash wallet is fully funded, you can now do the GCash to bank transfer. Just tap on the Bank Transfer icon below and you will see a list of partner banks. As of writing, GCash supports 37 banks. The big ones, of course, are there.
![]()
Next, pick a bank, enter the amount, enter the account name, then the account number. You also have the option to put your email address so you can receive a receipt of your transaction. Confirm the transaction and you’re done. In my experience, the whole process, including the Cash-In, takes less than 10 minutes.
![]()
Given the effectiveness of the service and the convenience that it brings, the GCash Bank Transfer feature has become my primary method when it comes to depositing money to banks. I’ve used this to transfer money to family members or friends or pay online sellers that require bank deposits. I don’t have to travel to the nearest branch and lineup to transfer funds. And since the whole process just takes a few minutes, I can do it almost anywhere, anytime.
So, if you’re fed up with the long queues in banks and want to save precious time, why not try GCash’s Bank Transfer feature. It works!


I sent Php6000 to my Metrobank account yesterday but haven’t receive the money yet till now and still no confirmation from gcash but my gcash money is already deducted. Anyone who encountered the same problem and what happened? Any solution?