
Making a screenshot on our smartphones is a piece of cake — pressing only the volume down and the power button or three-finger swipe does the job. But when it comes to your Mac or Windows PC, are you doing it right?

In this guide, we’re going to delve into different methods on how to capture a screenshot quicker with less effort on both platforms using only their built-in features. We will also explore on how to capture screen recording without any third-party software.
Capturing a screenshot on Windows
Let’s start first with Windows PC. Using the Print Screen key and Paint combo is now probably an ancient way on getting a screenshot on Windows. But since the Paint app has gotten more features over the years, this method makes quite the charm for new and veteran users. Here’s how:
Print Screen and Paint
- Press the Print Screen key, likewise the “PrtSc” key on your keyboard to capture your entire screen.
- Pull up the Paint app by searching for it through the Start menu or through the ‘All apps’ list.
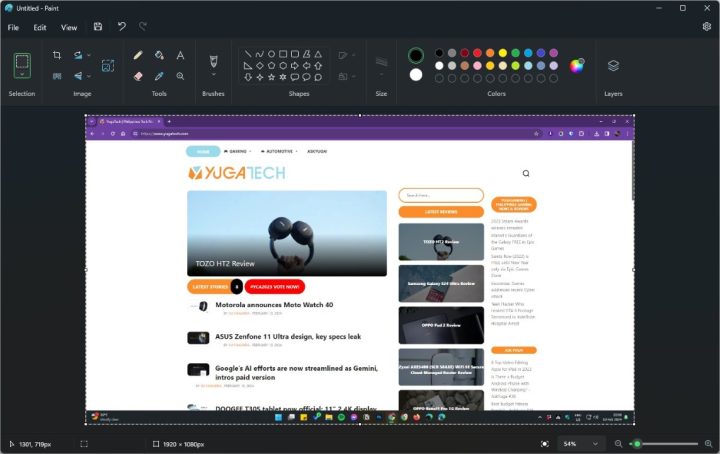
- Once Paint is launched, press Ctrl + V on your keyboard to paste the screenshot onto the canvas.
- From here, you can do markups using the tools inside Paint. On Windows 11, you can also remove the image background (although this isn’t quite polished based on my experience).
- Once you’re satisfied, you can either press Ctrl + S on your keyboard or find the Save icon on the top-left corner to save the image.
- Choose a folder destination where you want to save it and you’re done!
Tip: by pressing the “PrtSc” or the print screen button, your PC also saves it to its clipboard. Thus, you can conveniently paste your screenshots to your chat or messaging apps. Just be more careful since this method leaves you no room for editing or doing markups.
Snipping Tool
Just like Paint, the Snipping Tool got more features and easier to use. Spoiler: the app even has a screen recording feature now which we’ll walk through later in this guide. Additionally, you can also do markups within the app but with less tools to navigate.

- Launch the Snipping Tool by either searching or finding it in the Apps list or pressing Windows key + Shift + S on your keyboard.
- If you launched the app without using a keyboard shortcut: you’ll be greeted with a small window. Click on the ‘New’ button.
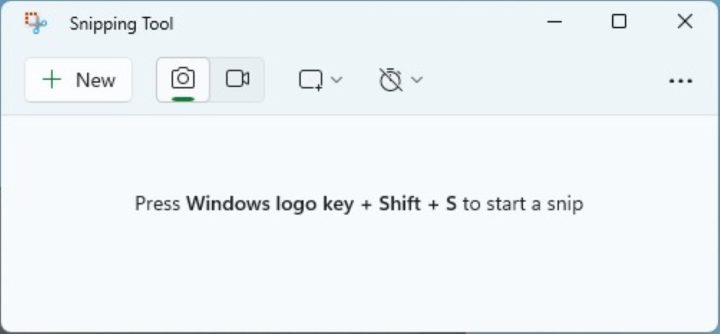
- Once clicked, your screen dims a bit, and a toolbar should appear on the top portion of your screen. This toolbar would appear right away if you used the keyboard shortcut.
- From here you can either select Rectangular mode that lets you screenshot a certain area on your screen. There are also Freeform, Window, and Full-screen modes.

- After you captured the screenshot, a notification should pop up. Click on it and a Snipping Tool window will launch where you can edit and do markups.Tip: the screenshot is also saved on your clipboard.
- Choose a folder destination to save the screenshot and done!
Additional tip on doing markups: one of the new features of the Snipping Tool is ‘Quick Redact’. This automatically detects sensitive information seen on your screenshot and omits it by patching a black bar on top of the text.
To do this, click the ‘Text actions’ icon on the tool panel and click on ‘Quick redact’ button.
Tip: Before launching the Snipping Tool, hit Control + Plus keys on your keyboard to zoom in on a window (a browser tab for example) to get sharper texts. Hitting Command + Plus on macOS does the same.
THE fastest way to capture a screenshot on Windows
If you want to get rid of all the hassle, then there’s one thing that your Windows PC is not telling you: Windows key + Print Screen. With this two-button keyboard shortcut, you can capture your entire and it will be saved immediately as an image file to your storage drive.
- By pressing Windows + Print Screen keys, your screen dims for a split second — indicating that a screenshot has just been captured.
- Nothing happens after that, but you should find your screenshot saved in the Pictures folder > Screenshots. It is also saved in your clipboard which really makes it convenient.
You may notice that the screenshot is saved as a PNG file. As of writing, I have not found any way to change its file format to JPG or any other formats.
Tip: in case you want to do easy markups, you can always use either Snipping Tool or Paint to do so. Simply drag and drop or directly open the image file in the app.
Capturing a screenshot on macOS
Now let’s move on to macOS. In my experience, capturing screenshots is a much more enjoyable on Mac, especially when capturing screen recordings. You will see why.
Just like the Snipping Tool on Windows, Mac also has its own app simply called ‘Screenshot’.

- Hover to your launchpad to find the Screenshot app or simply search with Spotlight to launch the app.
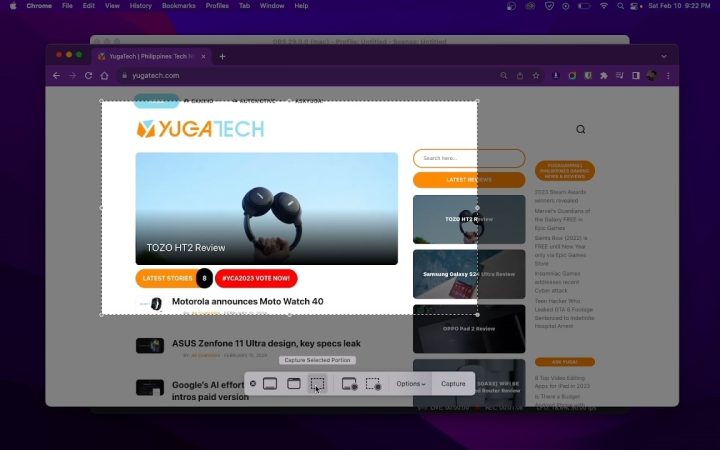
- A toolbar will appear showing Capture and Record buttons. The Capture buttons are similar to Snipping Tool options like capturing your entire screen, a window, or a portion of the screen. But in macOS, there’s no freeform option yet.
- After capturing a screenshot, a small thumbnail preview appears on the bottom right corner of your screen. By default, the screenshot you made is automatically saved to your Desktop folder, but you can customize this to save in another folder.Tip: hold the Ctrl key as you make a screenshot to copy it to your clipboard instead.
- Clicking on the thumbnail greets a new window where you can do markups. From here you can sketch, add shapes, and even add your signature.
- You can also do markups via the Preview app which unlocks additional features such as ‘Instant alpha’ that lets you crop select area within your screenshot.
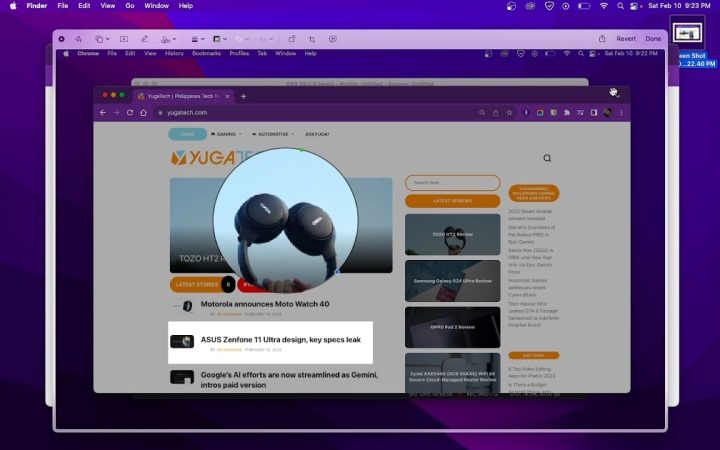
What’s I really liked about the markup tools in macOS Screenshot is how you can highlight certain parts of the screenshot. Just like the magnifier and that rectangular tool that makes highlights by dimming out the rest of the image.
My only gripe is the absence of a Quick redact option which I find useful on Windows. Hopefully they’ll add such feature in future macOS updates.
Next up, let’s talk about the macOS keyboard shortcuts. Unlike the Snipping Tool with only one keyboard shortcuts, macOS Screenshot has at least three, each having their own function.
Shift + Command + 3: this shortcut captures the entire screen.
Shift + Command + 4: turns your mouse pointer into a crosshair. This lets you capture a portion of your screen. Then if you hit Space bar, the mouse pointer turns into a camera that lets you capture a certain window.
Tip: window screenshots also capture a window’s shadow. To get rid of this, hold the Option key. Holding the Space bar allows you to reposition your selection without changing its size.
Lastly, hit Shift + Command + 5: pulls up the Screenshot toolbar, which makes the app quickly accessible.
For those using a MacBook with a Touch Bar, you can conveniently use the Screenshot button on it.
Capturing a screen recording on Windows, macOS
Now, let’s explore on how you can capture a screen recording on both platforms. For Windows, you can either use the Snipping Tool or the Xbox Game Bar — but its screen recording feature is only available when you are playing a game. So, in this case, we are only opting for the Snipping Tool.
There is no dedicated keyboard shortcut yet for this nor it is included in the toolbar. Perhaps, this feature is relatively new, and I hope Microsoft could add specific shortcut to it. But the screen recording feature does show up in the main app window as you launch Snipping Tool.
- On the Snipping Tool window, toggle the video camera icon, then click on ‘New’.
- A small toolbar will appear and turns your mouse pointer into a crosshair. Unlike in macOS, there’s no convenient option for capturing the entire screen. But then you can always select the entire screen with your mouse.
- Once you made a selection, there’s a new toolbar that pops up where you can select your input audio and an option to mute system audio.
- Click on Start button to start recording then the timecode beside it will run.

- Once satisfied with your recording, you can then save it to a folder destination as an mp4 file.Tip: if you have the Clipchamp installed — which is Microsoft’s new video editing software, included in Windows 11 — there’s a convenient button on the upper right corner to edit your video within the app.

Like I said earlier, this feature is relatively new to Snipping Tool which probably leads to the output’s low video quality. As I watch my saved screen recordings, I noticed there are tons of unnecessary chromatic aberrations, and the frame rate is not that smooth as compared to macOS. (Or is it just my own Windows PC’s problem? I’m not quite sure.)
Now for macOS, its screen recording output is quite decent with smoother visuals and less aberrations. HOWEVER, it doesn’t let you capture the sound natively. I found a workaround for this using the free software called Blackhole, but that’s another topic we can look into.
- To begin screen recording on macOS, either hit Shift + Command + 5 to launch the Screenshot toolbar or launch QuickTime Player > File > New Screen Recording.
- The same toolbar will pop up, and you can either capture the entire screen or a select a portion only. Hit Record.
- A small Stop button appears on the notification bar. Click this once you’re done recording.Tip: hitting the same keyboard shortcut Shift + Command + 5 will also show a Stop button included within the toolbar.

- Its preview thumbnail should also appear and from there you can play the screen recording. You should also find the video file saved to your default folder, which in my case is on the Desktop.
That wraps up this guide. At the end of the day, no matter how you make screenshots on your computer, it’s just as effective. What’s important is that it does the job right.
Did I miss anything? Share your own creative ways on how you capture screenshots in the comments below!
Disclaimer: The software used in this guide is Windows 12 23H2 and macOS Monterey 12.6.8. The above methods should also work on older or newer versions of both platforms.


0 Comments
Leave a Reply